The Requirement
Recently I posted about creating and using a certificate for use on and IIS website. I did this recently for my Dev to deploy his new web app, which required use of a devices camera for QR scanning purposes, well it runed out that the camera could not be used unless the app was secured with TLS (a certificate). So we created a cert and created a new secure binding.
However, it was soon pretty apparent every time I pressed the down arrow key on my browsers URL it would use the regular HTTP (at first we removed the port 80 binding which caused site unavailable issue). So after re-adding the standard port 80 binding for regular HTTP, I decided to use a rewrite rule to handle the redirection.
It wasn’t as intuitive as I thought it would be so a little google search and I was on my way…
As the source states, after you have your certificate and port binding for HTTPS, as well as one for regular HTTP.
In order to force a secure connection on your website, it is necessary to set up a certain HTTP/HTTPS redirection rule. This way, anyone who enters your site using a link like “yourdomain.com” will be redirected to “https://yourdomain.com” or “https://www.yourdomain.com” (depending on your choice) making the traffic encrypted between the server and the client side.
Below you can find the steps for setting up the required redirect:
The Source
-
- Download and install the “URL Rewrite” module.
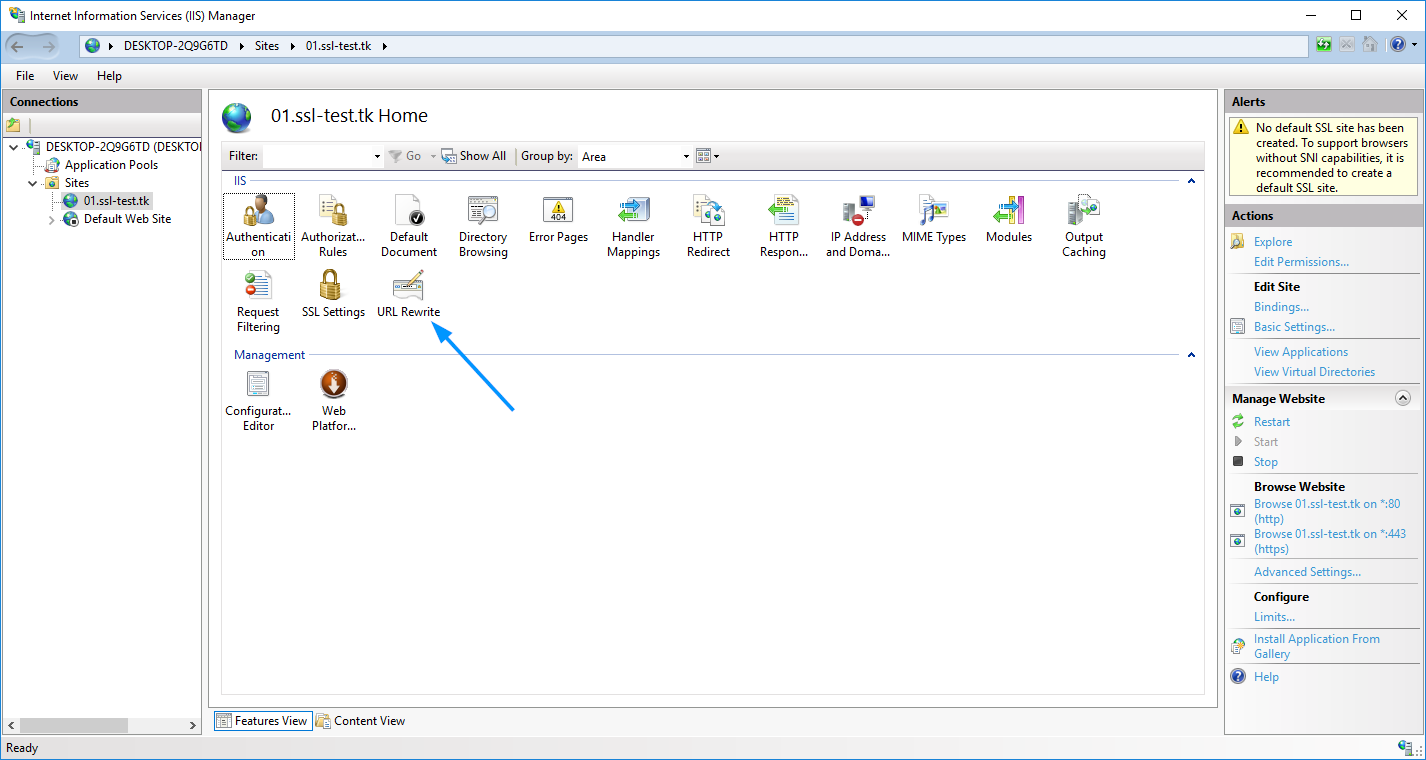
- Open the “IIS Manager” console and select the website you would like to apply the redirection to in the left-side menu:

- Double-click on the “URL Rewrite” icon.
- Click “Add Rule(s)” in the right-side menu.
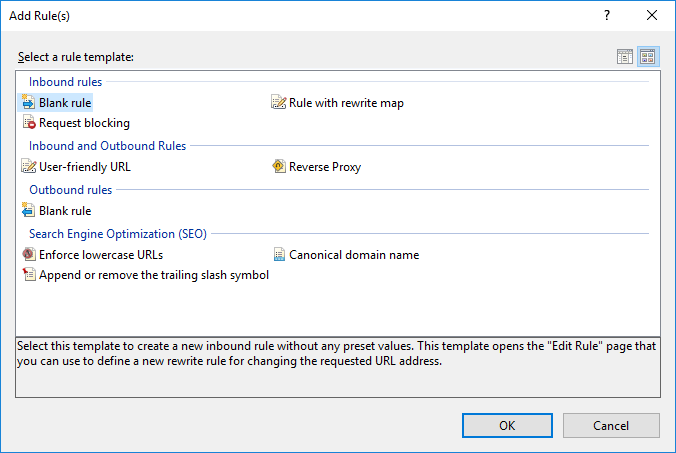
- Select “Blank Rule” in the “Inbound” section, then press “OK”:

- Enter any rule name you wish.
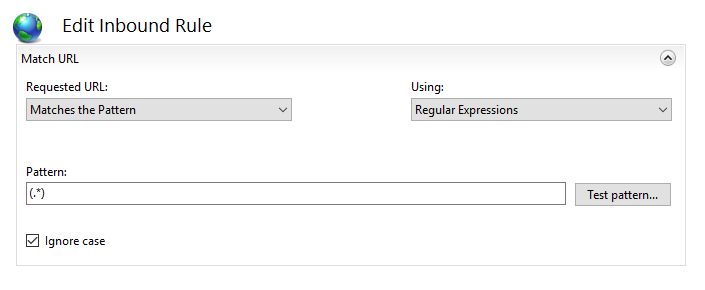
- In the “Match URL” section:- Select “Matches the Pattern” in the “Requested URL” drop-down menu
– Select “Regular Expressions” in the “Using” drop-down menu
– Enter the following pattern in the “Match URL” section: “(.*)”
– Check the “Ignore case” box
- In the “Conditions” section, select “Match all” under the “Logical Grouping” drop-down menu and press “Add”.
- In the prompted window:
– Enter “{HTTPS}” as a condition input
– Select “Matches the Pattern” from the drop-down menu
– Enter “^OFF$” as a pattern
– Press “OK”
- In the “Action” section, select “Redirect” as the action type and specify the following for “Redirect URL”:https://{HTTP_HOST}/{R:1}
- Check the “Append query string” box.
- Select the Redirection Type of your choice. The whole “Action” section should look like this:

The Note
NOTE: There are 4 redirect types of the redirect rule that can be selected in that menu:
– Permanent (301) – preferable type in this case, which tells clients that the content of the site is permanently moved to the HTTPS version. Good for SEO, as it brings all the traffic to your HTTPS website making a positive effect on its ranking in search engines.
– Found (302) – should be used only if you moved the content of certain pages to a new place *temporarily*. This way the SEO traffic goes in favour of the previous content’s location. This option is generally not recommended for a HTTP/HTTPS redirect.
– See Other (303) – specific redirect type for GET requests. Not recommended for HTTP/HTTPS.
– Temporary (307) – HTTP/1.1 successor of 302 redirect type. Not recommended for HTTP/HTTPS.
- Click on “Apply” on the right side of the “Actions” menu.
The redirect can be checked by accessing your site via http:// specified in the URL. To make sure that your browser displays not the cached version of your site, you can use anonymous mode of the browser.
The Helping Hand
The rule is created in IIS, but the site is still not redirected to https://
Normally, the redirection rule gets written into the web.config file located in the document root directory of your website. If the redirection does not work for some reason, make sure that web.config exists and check if it contains the appropriate rule.
To do this, follow these steps:
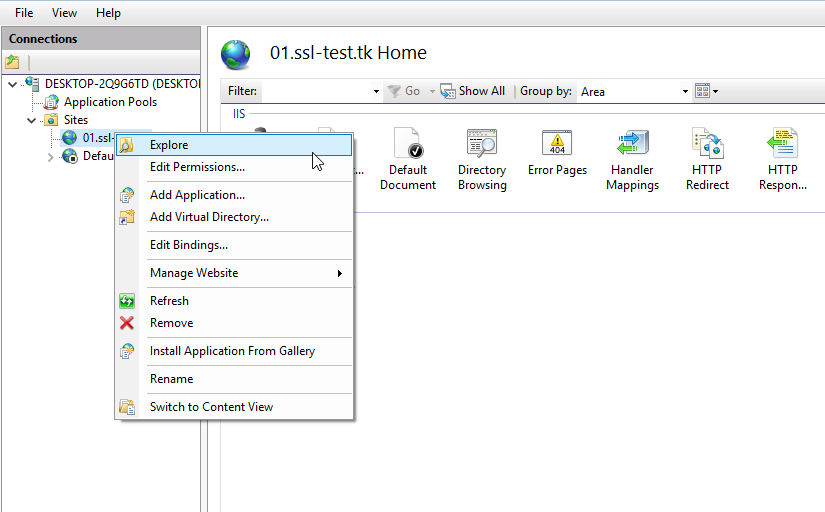
- In the sites list of IIS, right-click on your site. Choose the “Explore” option:

- “Explore” will open the document root directory of the site. Check if the web.config file is there.
- The web.config file must have the following code block:
<configuration>
<system.webServer>
<rewrite>
<rules>
<rule name=”HTTPS force” enabled=”true” stopProcessing=”true”>
<match url=”(.*)” />
<conditions>
<add input=”{HTTPS}” pattern=”^OFF$” />
</conditions>
<action type=”Redirect” url=”https://{HTTP_HOST}/{R:1}” redirectType=”Permanent” />
</rule>
</rules>
</rewrite>
</system.webServer>
</configuration> - If the web.config file is missing, you can create a new .txt file, put the aforementioned code there, save and then rename the file to web.config.
This one, much like my Offline Root CA post is a direct copy of the source. For the same reason, I felt I had no need to re-word it as it was very well written.
Thanks Namecheap, although it would have been nice to thank the actual author who took the time to do the beautiful write up with snippets. 🙂